Here is a tutorial for a bag that I made for my best friend at work. I hope she liked it! It is a reversible bag with a pocket on the outside and inside. I found the pattern on Pinterest (surprise!). The actual blog I had pinned took me to this site for directions and the pattern.

I started with a yard of each fabric. I was hoping to get 2 bags of of the 2 yards (a yard of each) but it wasn't quite enough for two... but too much for 1. I would say 3/4 a yard of each would be enough for 1 bag (or 1 1/2 yds for 2). I also used the duck type fabric so that I wouldn't have to use any interfacing. You could add that if you want (who wants even more steps...)

Fold the fabric so you get two seems (see below).

I laid my pattern out Idea of the bag from pinterest here; but she got that pattern here. I got the pattern from here and added a little bit of length to the handles. I wish that I would have added about 2 inches more.

It should look like this before you cut with the edge of the fabric on your seems.

Start cutting out your bag.


I marked each one of the darts to make it easier later.

When you're done, you should have 2 sides of the bag that look like this:


This is the time to make any pockets or add any embellishments. I wanted a pocket on the inside and outside of the bag. The fabric cut from the center of the handles worked perfect for my pockets.
I pressed the seam down for the size that I wanted.


I wanted a pocket of each pattern. After pressing the top seam down, I stitched across, following the pressed seam.

I cut the excess off.

I then folded the sides inward and pressed.


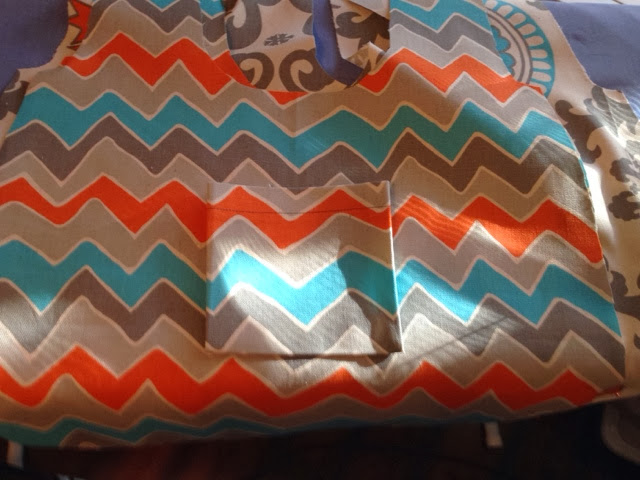
Now, taking the pocket, I placed it in the center of one of the sides of the purse.


Starting at the top, I back stitched to secure the thread and then carefully sewed around the pocket. Again, back stitching when I was finished. I repeated for the other pattern too.

Now, on to the darts.

I pinched the two pins together and sewed along that line. I did two darts on the bottom of each piece. (8 total).


When you flip the dart, it should look like this:

With the right sides together, stitch from where my finger is to the same place on the other side.

When finished, I pressed the seems on the side open, but couldn't get to the bottom of the bag.


Now, repeat for the other pattern of the bag. When finished with the 2 separate bags, put one bag inside the other with the right sides together (inside bag looks right, the outside bag looks wrong).

You want to sew along the separate handles like shown below. You should be sewing the handles to the opposite fabric pattern. Stop when you get about an inch and 1/2 from the top. On the first side, sew like below.

On the second side, sew all but 1 edge side (see the pins?) This will make it easier to flip

Now, don't be stupid like me... stop and clip along the curve part like below before flipping the bag. I forgot this step and had to turn it back inside out... trim and flip again.

Now it's time to flip. You should start to see your bag taking shape.

The tops of your handles should look like this. Sew the handle tops right side together (making sure you sew the right ones together) and press open. Pin and press the sides in so that when you top stitch, it's easy to fit together.
Next, press the handle that was not sew together so that the top stitch will cover and close it. Top stitch all sides of the handles.
Next, press the handle that was not sew together so that the top stitch will cover and close it. Top stitch all sides of the handles.

Ta-da! All done!! :)


